0x01 notes for the future - can anyone have too many displays?
2014-12-21 21:24:58
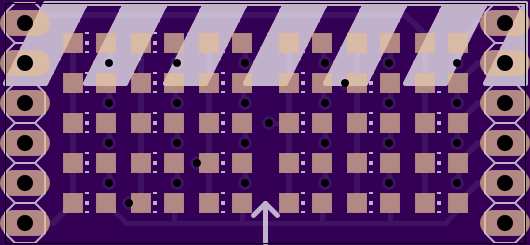
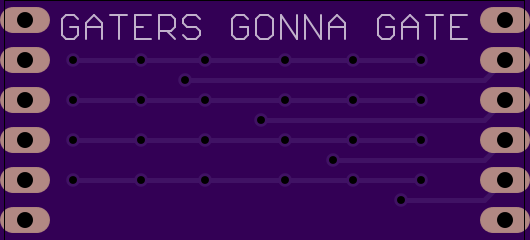
Almost three years ago I bought some 0805 cyan LEDs to make a tiny stargate inspired display. Since I haven't figured out any markings and wasn't able to hand solder them the project was on ice. Last week I've revisited the idea and designed some pcbs that are fool proof in terms of orientation making it easy to place LEDs in one direction without knowing anode or cathode. With some solder paste and my toaster oven I hope to achieve a good result ending with 3 boards - hours - minutes - seconds - that I will put on some perfboard arduino/74hc595 timer/watch thing.
Raspberry Pi Stuff
Plans for an arduino based raspberry pi shield are forming, I definitely want some goodies on there like controlling ws2812b, 5V fan controller (yes a fan...), 433mHz module connector, SD card logger, current measurements, reset button, shutting down button. Kind of bummed out that my raspberry crashes when I make a picture with the camera module and ssh is poorly slow.
0x00 notes for the future - holidays without a notebook sucks
2014-11-24 20:26:55
Attiny45 current logger
My raspberry pi setup was meant to somewhat satisfy my needs for a computer on my vaccation while my macbook battery would be replaced in the mean time. But somehow it always fried and frustrated the hell out of me. I think that is because of my insufficient power supply - 1A could be a bit to weak for a b512 with wifi and a hub. So I googled on my tablet pc how I could measure amps with an arduino and found this site http://www.vwlowen.co.uk/arduino/current/current.htm - ordered some 0.05ohm resistors and plan on using the integrated gain of the analog to digital converter to get a better resolution and store the data on a rolling array.
RGBW Flashringlight
For my 29th birthday and christmas I got myself a dslr - with generating youtube videos and project documentation in mind (some nice sonic screwdriver long exposure pics are on the way). I would love to see how a ws2812b rainbow ringlight would look like, but i think the adafruit rings are too expensive. Ebay had some interesting leds, though /pages.ebay.com/link/?nav=item.view&id=261645486643&alt=web
Cypress Logic analyzer
Someday in 2011 there was a blogpost on hackaday [http://hackaday.com/2011/12/15/saleae-logic-analyzer-knockoff-hacking/ ] about a clone of the saleae logic analyzer and I bought a cy7c68013a dev board for under 10euros but never plugged it in. So with my raspberry working in console mode I fired up fxload and sigrok-cli but the ported versions were not the newest and compiling didn't work either so I wasted a lot of time on this... have to revisit that.
Game boy camera polaroid instant camera
this could get interesting - taking a printer module and a camera and merging it with an arduino to get an instant camera thing in a nintendo style. Ben Heck style maybe.
I killed my camera
2014-11-11 00:27:53
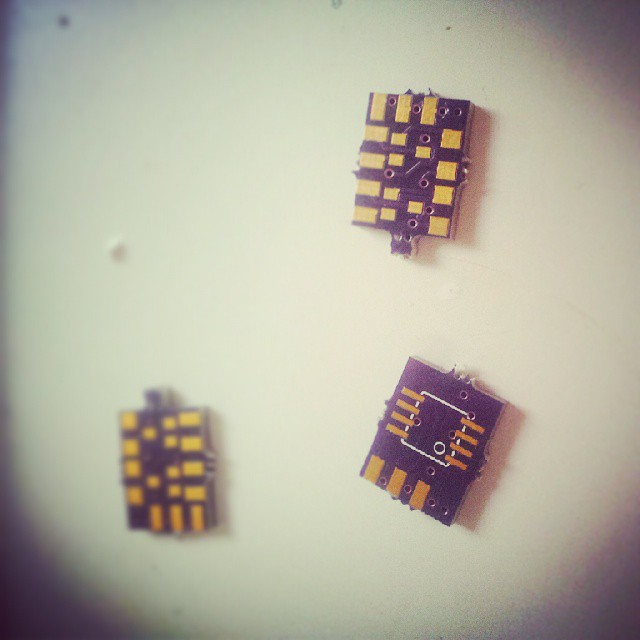
Good thing it was only a 7 Euro key-fob camera in 808 style, but I killed my time-lapse project with that. I wanted to wear this on the hackaday event taking pictures constantly with a harvested lipo from a macbook. I even shrunk it down from an arduino board plus perfboard and wire porn to a self-designed attiny85 board. While debugging one I must have killed the camera, because it won't take pictures or videos anymore - so I ordered a new one on ebay for 4 Euros. Btw., the boards were so tiny, that I didn't even get a sticker with them (I already have enough of them, nevermind). It is a bit messy to work with in eagle, but I like putting pads on the edge to solder the ISP connector sideways.
Towani Lifesign Wristdevice - Star Wars Ewoks | Shipping fail
2014-10-29 02:38:48
It has been 2 months now since I have ordered the cheaper heart rate sensor and unfortunately it got lost on its way here. Additionally I ordered around the Chinese National Day and I lost track of the time so now I'm overdue on my buyer protection. So I'm hoping that they will resend the sensor as soon as they read my reply today.
Some thoughts on the software, I think it will be a good idea to measure the time between pulses and send the value over the NRF24L01s and not the value of the analog read outs. Some what a bicycle computer for your heart. While writing that I just thought of connecting this project with the Open-Bicycle-Computer. Let's monitor the pulse of the bikes rotation and show the heart rate on the bicycle computer!
I'm going to order another heart rate sensor from a different seller to make sure I get one.
Fixietube - Fake Nixie Tube displays | Fixietube clock!
2014-10-18 00:17:27
Today I gathered some code for the ds1307 module I bought for this "fixie-tube" clock project. I used a cheap arduino clone and some wood to hold the sockets together. Soldering a cable was annoying, but I succeeded in the end. The setup is still temporary, since I want a laser cut case for those beauties. Right now they are to far away from each other, you can't read the time with one glimpse.

Fixietube - Fake Nixie Tube displays | sockets on thingiverse
2014-10-12 20:27:06
so now I got the printer of my firm at home I was able to test and tweak the design of the jam jar sockets. Now I have four printed out and need to connect the displays with an arduino.
#wunderhack || a wunderbar hackathon
2014-09-26 13:17:03
The wunderbar
The wunderbar comes in a package of 6 BTLE sensors of different types (temp, light sound...) and an embedded device that connects over wifi to the Open Sensor Cloud Platform. It aims to be an easy “Internet of Things” starter kit, where you don’t have to worry about the security and hardware since it has all been taken care of the relayr.io-team.
The beginning
On half past ten on friday, september 26th around 40 engineers, designers and developers gathered at the betahouse in Berlin to be welcomed by the relayr.io team for their first 24 hours hackathon around their product - the wunderbar. A brief introduction was given of what the idea behind the wunderbar is, how the communications and the hardware is setup and that the hashtag for this event would be #wunderhack. Deciding factors would be “quality of code” and “use of third party devices”. We the contestants introduced our ourselves and our ideas for projects.
The teams
Sensor driven canvas - Christophe, my colleague from wakesys.com and I are webdevelopers and wanted to augment an html5 canvas with sensor data from the wunderbar, which could be used for bargraphing, painting and gaming [webAPI]
Wundersound - Julian, Jose and Khaled pitched to use the sensors and a kinect to create sound or manipulate sound [iOS SDK]
GrannyVision - a monitoring device that tracks the health of a beloved elderly was presented by Chris, Simon and Steven [iOS SDK]
Saunopportunist - an idea I worked before on the hackday with Tracey, but together with Marcus and Falko the HERE Team refined their design and redid the software from scratch to build a sauna monitoring device and email alerts and android push notifications [webAPI]
NoNameIdea - Jan and Julian arrived without a project and turned their wunderbar color sensor into a colour caller for blind people [webAPI]
Babybico - Nabhila and Miha joined the hackathon with their baby sleep monitor app, they want to turn into a product [Android SDK]
Keybox - the keydock.co Team brought their product to research a way to integrate the wunderbar into their product to make use of NFC tags on the keys of their customers customers [Android SDK]
gestureBeacons - think of a scenario where a shopping window interface would let you swipe a beacon to rotate a mannequin to see a combination from behind and control a PHILIPS hue to see it in different colors [webAPI]
Supermap/Wunderbahn - scan your color coded station and your destination to get a charlie-plexed LED station matrix lead you the way, this idea was from Tito and Ema, who were joined by John [webAPI]
The hacking
Two hours in the contest and we created the github repository, found our libraries and tested our canvas with additional mouse events, while still waiting for a wunderbar. Turned out that so many wunderbars were present, that the “onboarding” process for the sensors failed (all SSIDs and BTLE names were the same) so every wunderbar had to be onboarded in a separate location. After 30 minutes with the wunderbar their cluster server broke down, but it was lunchtime and I was trying to burn the firmware on the Grove/Bridge module over BTLE afterwards. With no luck we had to ask the Team to do it again, the first time was for the color sensor to deactivate the onboard white LED, which was so bright that the color readings were wrong. Until half past ten the server was down, leaving everybody not able to work with the wunderbar for 9 hours. Not a good start for a contest all about the wunderbar!
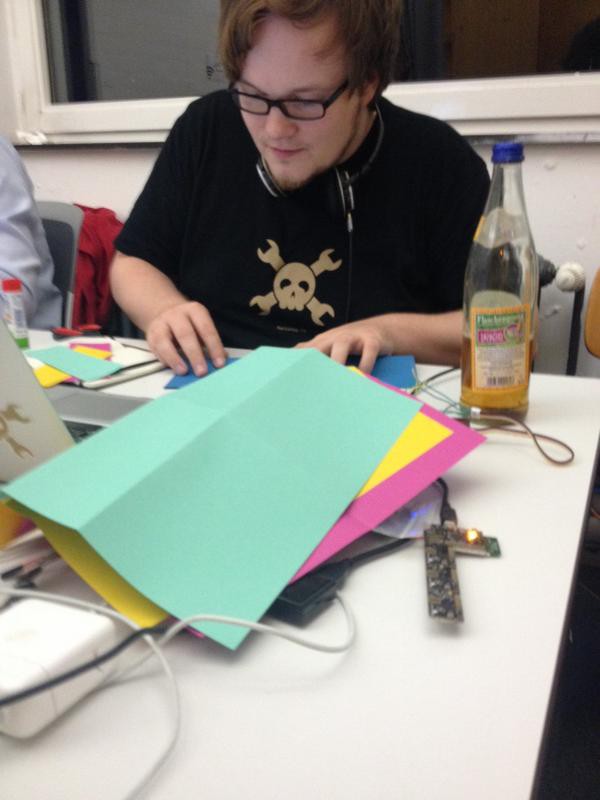
But with all the hassle we still got our project to a surprisingly stable and presentable state over the following 15 hours. Post-wunderhacking the judges came in to watch each project presentation with the other contestants.
The results
Keybox realized early that the wunderbar was overkilling their product and used the time and atmosphere to brainstorm their product flow instead. Babybico actually managed to deliver an android app that also pushes data to a smart watch, when the accelerometer and microphone reached a certain value. With the third project (NoNameIdea) the jury and Jackson (co-founder) decided to kill “quality of code” as a factor to win the prize. The fourth project was the team around wundersound, that managed to work out a kinect to arduino bridge and a triggered sound interface, but the iOS SDK was declared not ready at 6 in the morning so they could not bring it together with the wunderbar. Up was our turn and I managed to sell our “flightsimulator” canvas quite well and I felt relieved. The saunopportunists presented their project where the temperature device was not fixed until 5 minutes before all presentations began and Marcus showed a lot of patience with 3 boards that didn’t work. Sadly I missed the presentations of the gestureBeacons and the wunderbahn team, but I talked to John who I knew from the hackday two weeks earlier. Wunderbahn could not work out the problems of the wunderbar and built it based on an arduino instead. The GrannyVision Team were also troubled with the missing iOS SDK but managed to upload their sensor data to the relayr cloud.
The winners
So there we were, no sleep, no shower and no clue who would win, when the jurors came back with the results; third place and winner of the quadrocopters were the gestureBeacon guys. Winner of the PS4s and second place were the wundersound guys. Their 3rd team partner left after start, only returned for his buddies in the morning and was surprised like all others when he was given a PS4 as well. The jury decided to give the 4th PS4 to the color telling sensor guys. Babybico convinced everyone with their working app, 3d printed case (they brought a printer with them), well designed graphics and their motivation for the idea! The 2000 EUR for the first prize will be probably be of some help when they start to run a business.
The balcony
The unofficial evaluation at the “smokers lounge” was, that this hackathon was not a total disaster thanks to the relayr.io-team fixing all their and our problems within the contest. For a product that is already available to buy/pre-order, it felt not ready or at least a heavy burden for their support team. But we were all happy to be there, have met awesome people and this great team, the food was tasty and the fridge filled with Club Mate. Relayr is on a good path with the wunderbar, their concept seems right and they are able to make it work the way they want. It may was a rough hackathon for them but everyone learned a lot that day and since we all were supportive and understanding, the relayr.io team decided to give out a free wunderbar for every team not taking the first, second or third place!
The links
the wunderbar - https://relayr.io/wunderbar
Eventpage - https://relayr.io/event/wunderbar-hackathon
twitter - https://twitter.com/hashtag/wunderhack
Me failing at live blogging - http://live.24liveblog.com/1268741
Game Boy Printer vs. Arduino
2014-09-23 23:41:10
I won the fubarino a while ago on hackaday.com because I worked a little easter egg into a Game Boy Printer library for the arduino. The printing from code was a work around since I never got the serial running. I ran into problems though, trying to print more than 2 arrays of 640bytes and thought that while my code reached a compiled size of 8kb+ that my cheap chinese arduinos where just faking the 32kb and the code would not fit. Like any other project it went into a box until sunday some one contacted me on github and I got motivated to get into it again.
I tried 2 arduinos and again bricked them and had to install the bootloader over ISP, to get them working. At one time I started noticing jitters on the serial line. So I googled for maximum array sizes on a arduino and I finally found the problem and the solution. The atmega328 has 2kb of SRAM and this is where the values are stored, so having 3 x 640 (1920) bytes is definitely overkill.
http://playground.arduino.cc/Main/CorruptArrayVariablesAndMemory#Array_example_and_comparison
Storing the picture in flash finally let me print up to ten rows of a picture, which was the maximum the printer could take before printing. But I wanted to be able to print endless pictures and after printing there was always a boarder of 3 rows and 1 row starting the next part. That was finally fixed when I found that the printing command contained the margin before and after the prints. With that fixed I was able to send multiple lines, but they were all just fired on the printer and only one row got out. Then I noticed, that Miles Burtons code wasn't waiting for the print to finish, so I copied the code from furrteks attiny code and bam, it worked with 17 lines of 640 bytes so far.
I also updated the code for generating the arduino lines on my webpage to give out progmem values and created a canvas based html5 page on http://davedarko.com/canvas/ - be warned that the pictures will also show on http://davedarko.com/gameboy.php
What an adventure! I'm not sure how I will proceed from here, I like the web based approach and don't want to make a processing app, working the algorithm again. So, internet of things stuff for a 16 year old printer anyone? Arduino and ENC26J80 maybe?
exploring the fubarino SD | Nintendo Game Boy Stuff
2014-09-21 00:58:50
Since the fubarino has so many pins (45 IOs) and there is a lot material out to grab data from cartridges with an arduino, it should make a good controller for this. I created a cartridge board to get to the headers and this time I didn't want to order and wait for 3 boards because I'm in the mood for etching boards.

Fixietube - Fake Nixie Tube displays | socket for jam jars
2014-09-20 23:33:41
Once again I'm not quite satisfied with the printing quality of my printer, but It was enough to print one socket for a test.

http://www.thingiverse.com/thing:470666
Towani Lifesign Wristdevice - Star Wars Ewoks | Pulse sensor ordered
2014-09-02 20:29:58
The coolest sensor I found with a lot of effort put in and as much open source as you can have was the http://pulsesensor.myshopify.com/pages/open-hardware - but with a price of 20 Euros it was to much for this project. Today I looked for arduino modules on ebay and this popped up http://www.ebay.de/itm/331290728104 - for 6 Euros - I could not resist!
thoughts and links for game boy cartridge stuff
2014-09-02 11:42:32
Seems like every month I stumble over an idea and can't get rid of it. This time of year I always get nostalgic and thought about using the fubarino as an cartridge reader and programmer for simple eeprom cartridges. I'm already developing a little board to start with the interface. I wonder if the fubarino could also act as an cartridge itself. Nice stuff to get started. I'm also interested in those memory bank controllers and how they work.
I had to make a part for the edge connector, great exercise! Although I'm not yet happy with it, because the pads aren't long enough. Wiring was a mesmerizing nightmare :D
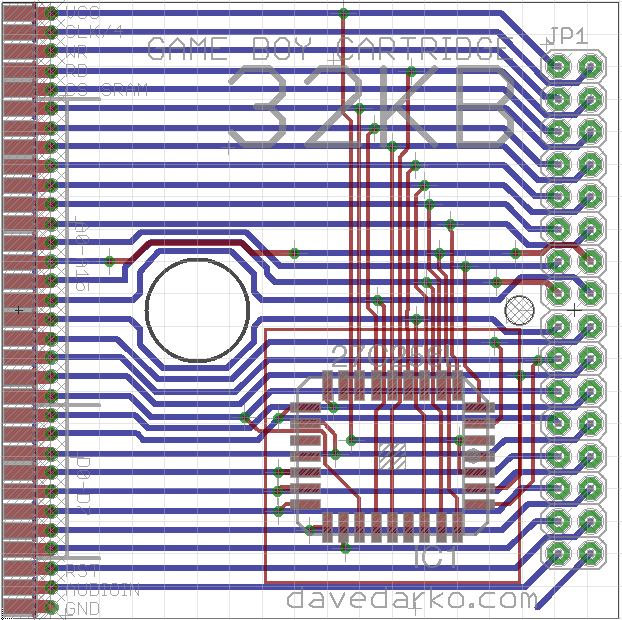
And here is a list that comes in handy to resource games I could clone on this simple device. I have no idea what I am doing, but that is always the most interesting part.
http://www.devrs.com/gb/files/gbmbcsiz.txt
Funny thing about the price, it would not matter if I order 3 eeproms and 3 oshpark boards vs. 10 eeproms and 10 dirtypcbs. Kind of strange, but there are more then 10 games out there with 32kb so worst case scenario would be having 10 games. But I also want to program stuff myself and hope to get some GPIOs working - get that wifi dongle http://hackaday.io/project/2879-ESP8266-WiFi-Module-Library to work :D - in theory you could get a controller pull your twitter feed, store it in ram and have a program read it out. Seems like a good amount of work and a long life project.
Another cool cartridge concept is to have an arduino library for it, and the gameboy would fetch data to display and safe the button states so the arduino knows what button is pressed. This way you could use it as a remote.
Maybe it is possible to come up with an mbc-1 clone to adress more memory.
Some general informations:
http://www.reinerziegler.de/
http://meatfighter.com/gameboy/TheNintendoGameboy.pdf
Great help for opening the cartridges:
[german, but the pics give it away]
http://www.retro-universum.de/howtos-und-anleitungen/offnen-von-alten-game-boy-spielen/
Fixietube - Fake Nixie Tube displays | moving on to a clock
2014-08-30 21:19:20
So far I have 4 of those fixietubes ready and since I only need 4 for my clock and I soldered for 2 or 3 hours I leave it with that for today. Next up will be to wire up the shift registers, connect the ds1307 RTC module and 3d print a base where the glass can be screwed in.

exploring the fubarino SD | first ported sketch
2014-08-29 23:17:17
I made those duo LED charlie-plexed matrices a week ago and "ported" my arduino sketch to the MPIDE in order to control them. I only had to swap the pin numbers and it worked like a charm.

https://www.gifyoutube.com/ - great for gifs from youtube videos! But be sure to stabilize the video before, since they seem to store it.
Code can be found in the gist: https://gist.github.com/davedarko/80f22bc34e118fd3d564
And some thoughts on the matrices: http://hackaday.io/page/456
Sonic Screwdriver | update 08/29 - the gremlins are here
2014-08-29 22:11:29
I had to connect power and signals (probably soft-serial or IIC) and write up some software for the charlie-plexed POV display. This way you can wave the sonic around and read which program is selected.

Fixietube - Fake Nixie Tube displays | controller boards finally arrived
2014-08-19 21:30:29
So finally my boards got through customs (I think they wondered what it is about that many purple envelopes sent to me). On there I soldered a transistor, a 74hc595 shift register, 8 blue LEDs and some resistors. I mixed up Latch and Clock the first time testing and got scared, checked the circuit again and found my easy to fix bug - and it worked!

I hope it is noticeable; I got some wire mesh for the looks as well :) The orange lost some red tones again in the picture, but I guess nixies do to... now I only need to solder 3 more, work out the ds1307 and some software and power things and I build myself a fancy clock :)

upcycled my first atmega8 board
2014-08-15 13:01:11
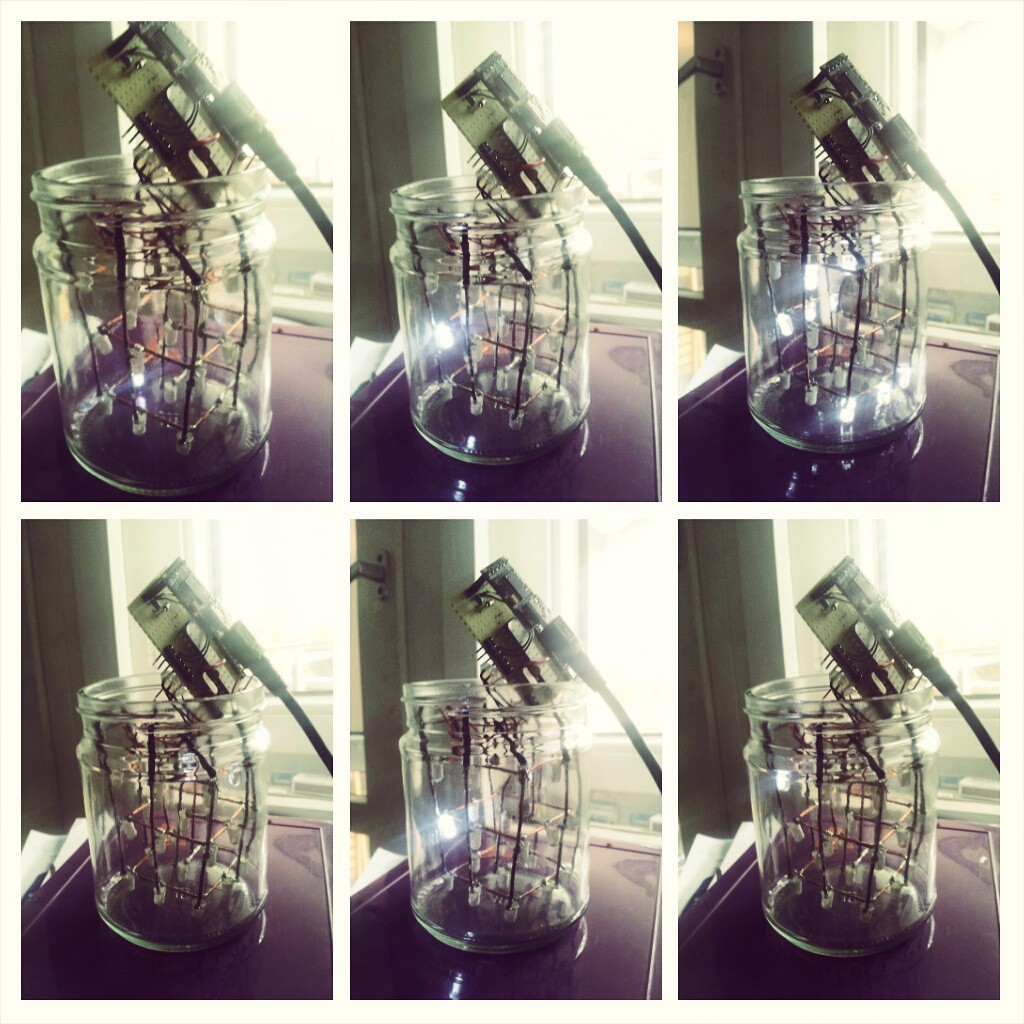
A friend told me once that her flatmate wanted to build a LED cube and I was like "pfff, I can do that..". I started to look for LEDs and stuff I would need, but had so much stuff laying around, that I said "use the stuff you already have" and harvested LEDs from a LED array of a flash light and used some big copper wires for the frame. My first Atmega8 was directly soldered in a messy way on perfboard - I corrected the dimensions and burned the atmega8 bootloader on it (including the auto reset "circuit" for the ftdi adapter).
That was 10months ago. Yesterday I finally joined the atmega8 board with the LEDs and programmed a crappy animation on it. Sometimes it feels good to not over engineer stuff and just go with it.
TIP: if you have clear glass LEDs like me, use some white acrylic paint to diffuse them.
Locomatrix - 3D POV - a different approach | fixed the gears - still no 3D stuff
2014-08-14 18:15:23
see for yourself...
Sonic Screwdriver | pcbs still are like gremlins
2014-08-10 09:48:59
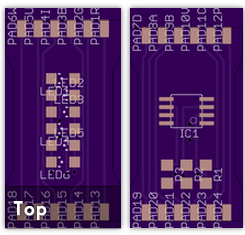
I don't know where I wrote this, but I wrote this already. Don't order pcbs after midnight :D I missed 4 pins on the attiny for the charlie plexed menu I plan to control via IIC (or serial). This will need some adjustments. I hope they are still programmable by isp, when one pin is connected as a charlieplexed pin.
Sonic Screwdriver | update 08/08
2014-08-08 16:27:42
I'm quite pleased with the head so far :) not sure about the display section yet and the mainboard is not designed yet, as well as the power section.
