WIFI Game Boy Cartridge | moar research.
2017-05-12 20:48:51
So from far away it looks alright! I checked every byte and the data is correct. But...
 Look a bit closer and you see this:

It might make sense to give the ESP the control over the OE of the data pins, since it's not fast enough to react to every change on the fly, it might needs better timing.
blinking things | HT16K33 board arrived
2017-05-11 21:09:29
Board works :)

BINCL - binary coded decimal 10mm LED clock | considerations for REV2
2017-05-09 10:26:29
As soon as I've had send the board, I just knew that new ideas would flood in. Here's a list of improvements for the board.
- bad pin planning: could have spared the RX/TX line and add an "FTDI" pinout, this way I need to program via ISP only
- add a transistor to the ground of the LEDs for dimming
- add a photo resistor for checking light of environment
BINCL - binary coded decimal 10mm LED clock | picture added
2017-05-09 10:21:40
I've added a size mockup with some 10mm LEDs I still have from other projects. The ones I've bought for this project look more like this:

WIFI Game Boy Cartridge | Needs moar research
2017-05-05 00:05:46
I can't believe that I'm so close already... but I do need to check the timings and need to find out if I can advance the code more. This needs to be connected to an analyzer.
WIFI Game Boy Cartridge | Hardware setup
2017-05-01 22:52:17
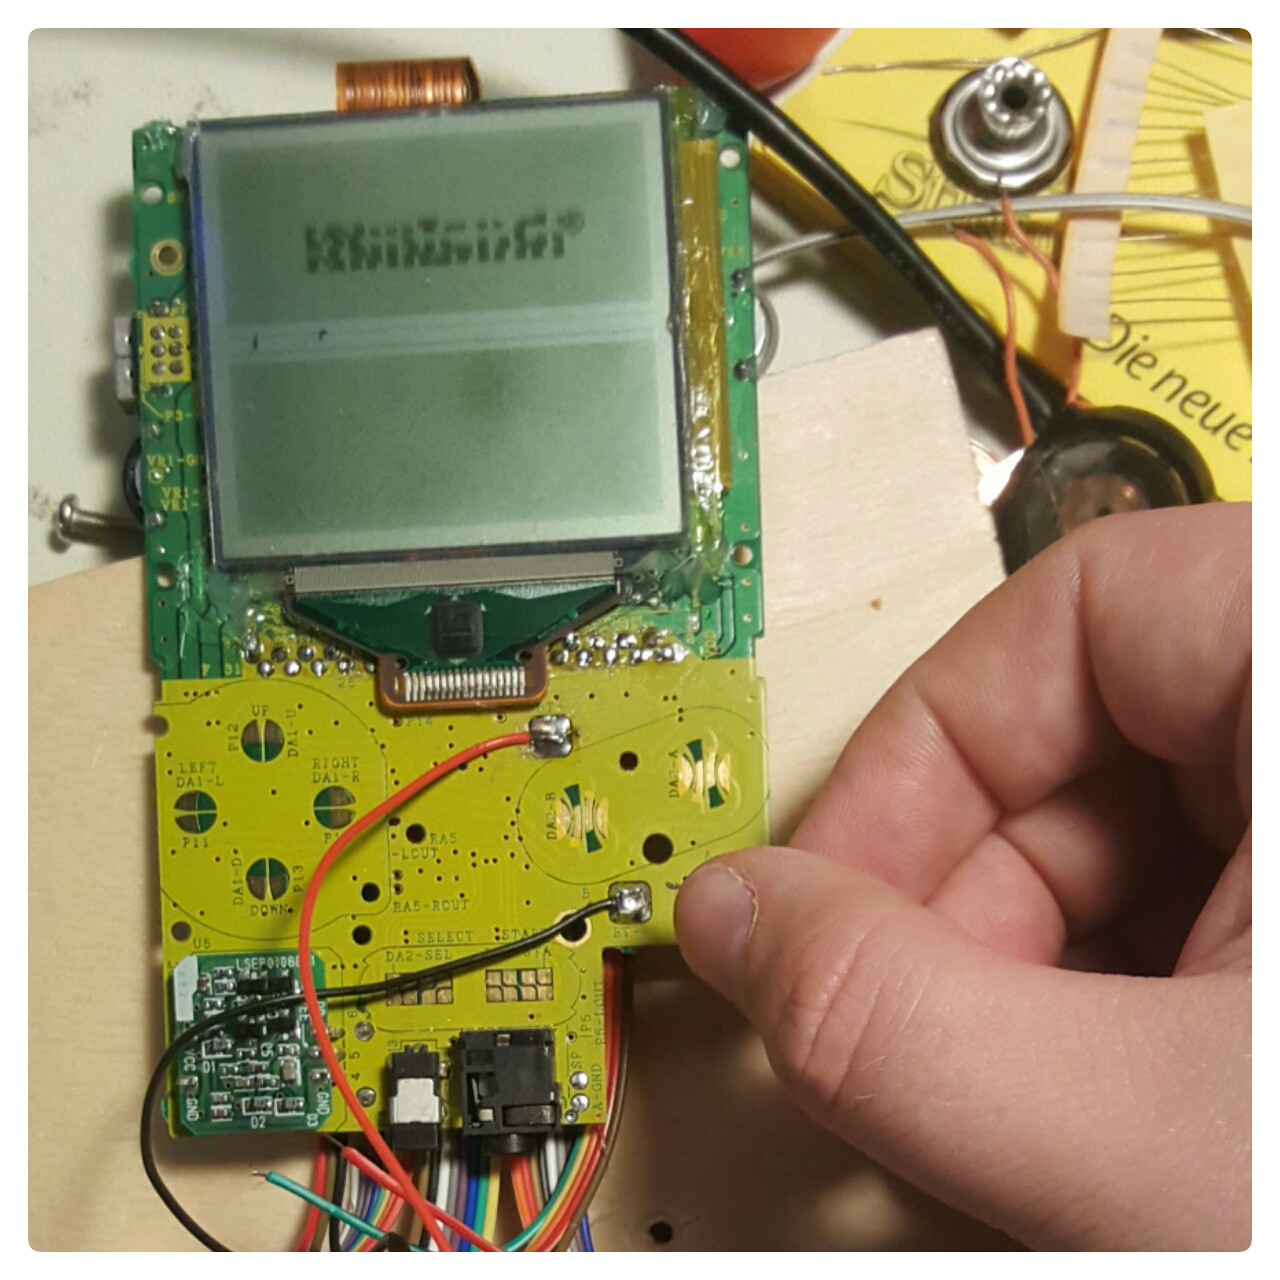
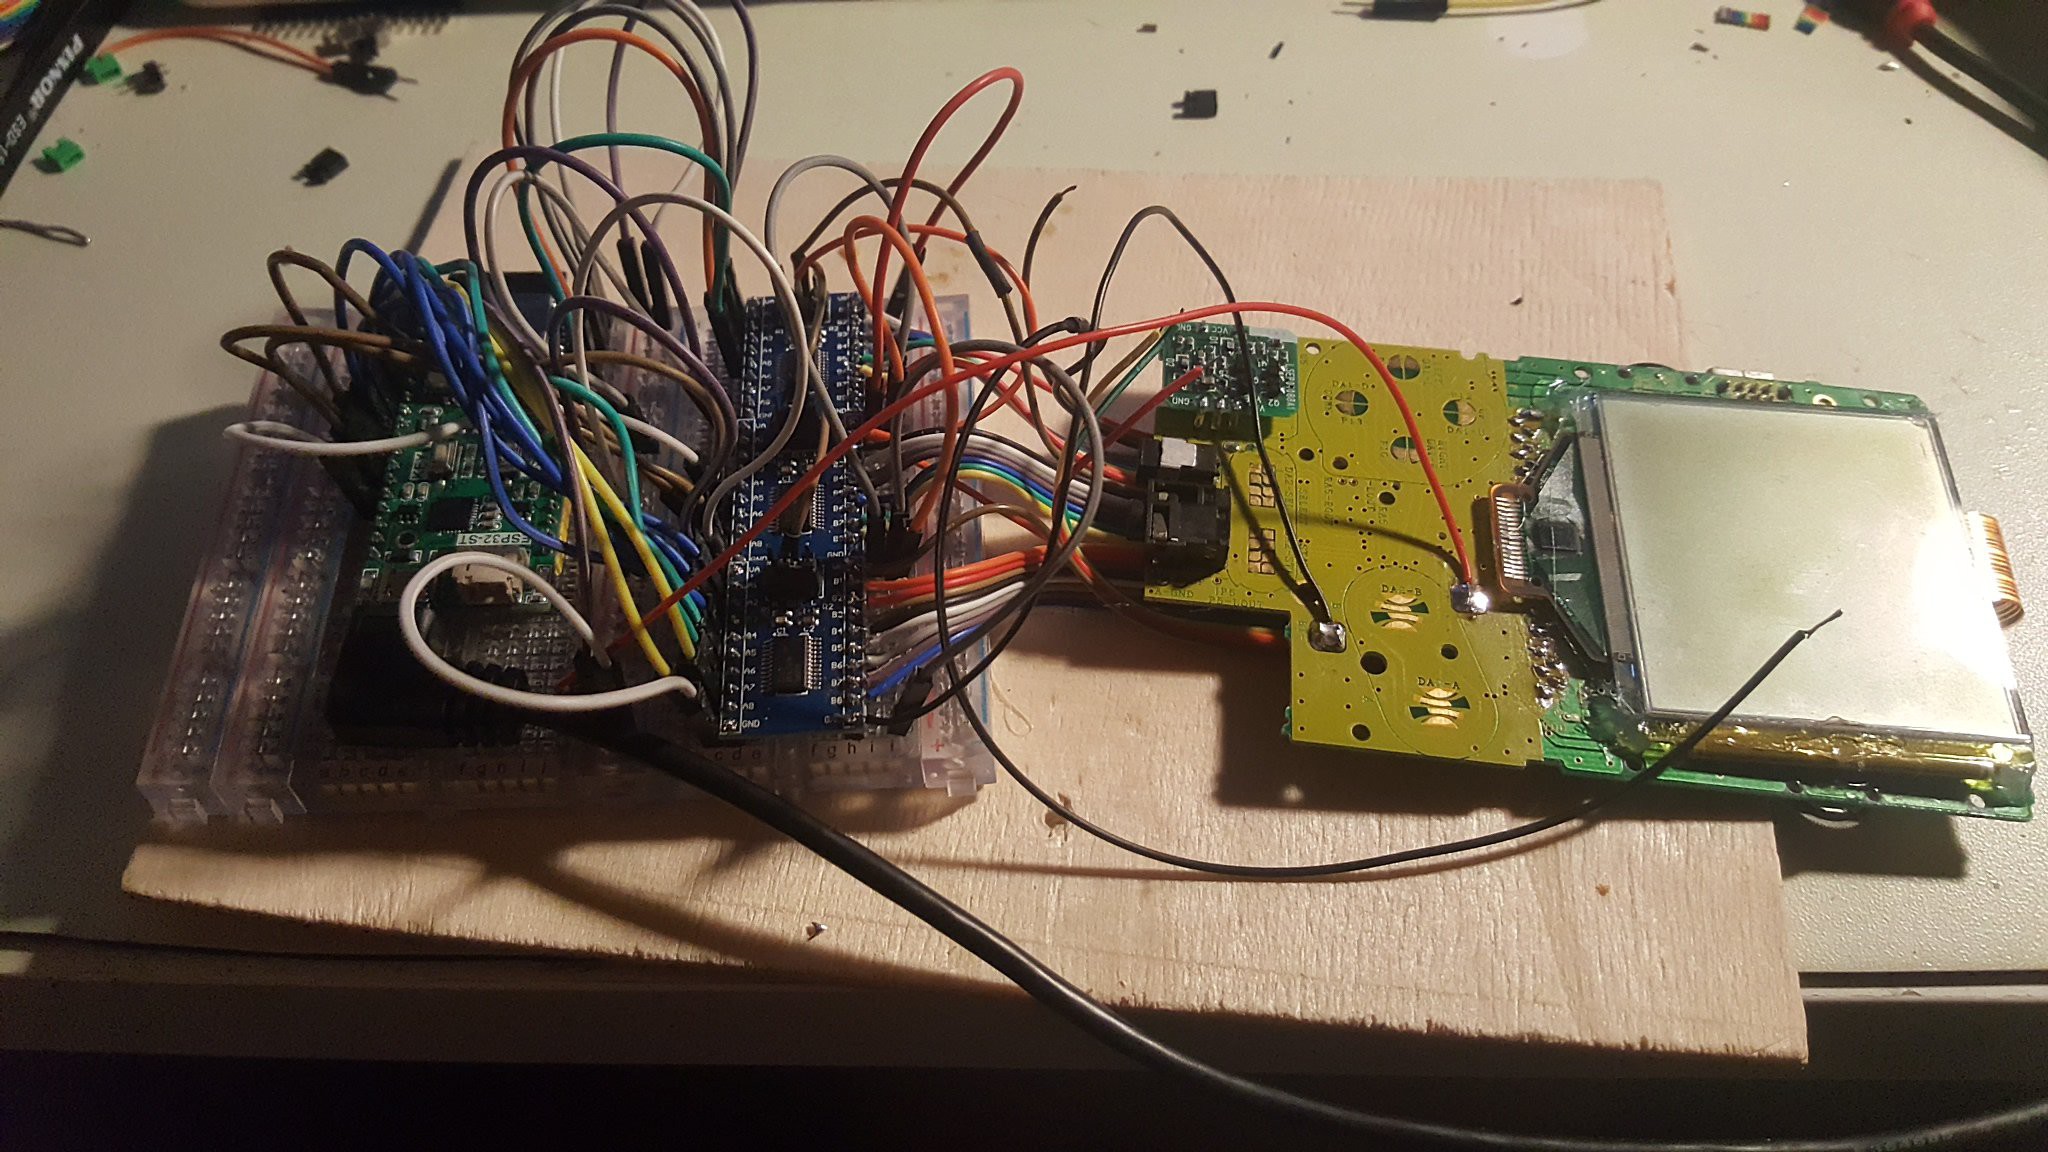
I'm still missing some cables, but so far it is looking quite interesting. I've recycled a donor board, replaced the missing switch with a wire, supply the game boy off of the 3V3 power of the esp board through a diode and soldered 32 cables to the missing cartridge port.
WIFI Game Boy Cartridge | what a week - no end in sight
2017-04-22 21:37:40
The whole week was filled with work - taking support calls, fixing bugs, meetings and more support calls. In between all that we tried to develop the important stuff. Yesterday, after work, I prepared my room for some dry wall construction ,to close the window between my room and the kitchen. Today I was mainly helping my father to build up the dry wall. The next few days I will be painting, letting it dry, glue on wallpaper, letting it dry, putting paint on the wallpaper and letting it dry as well. To make the Wohngemeinschaft great again. My bed is right next to the wall, before the wall I was awake when my roommate was.  I need to fix up the light switch as well - I see a Wemos D1 mini soon hanging there too :)
Anyways. Back to the project - I received all the parts to get prototyping started and I'm excited to begin, as soon as I can possibly do, but not today - I'm tired. Funding looks great, e-begging works :D
Game Boy Cartridge plus Programmer | Hackaday Prize 2017
2017-04-20 23:24:22
#WIFI Game Boy Cartridge - this is my entry for the hackaday.io prize. It is all based on the efforts I've made in this project. But everything I've done here was also in preparation for having an Internet connected Game Boy. Once the IoT segment of the prize is opened, I will submit the project to that as well.
There is currently a funding round, where every like get's you a dollar - you probably have already heard about that ;) It would be great if you could head over there and add a like to the project - feel free to remove the like once the funding is over and maybe give it back once everything works :D that would be pretty motivational.
Anyway, I wish all the contestants the best of luck!
WIFI Game Boy Cartridge | getting closer to a layout
2017-04-19 22:54:44
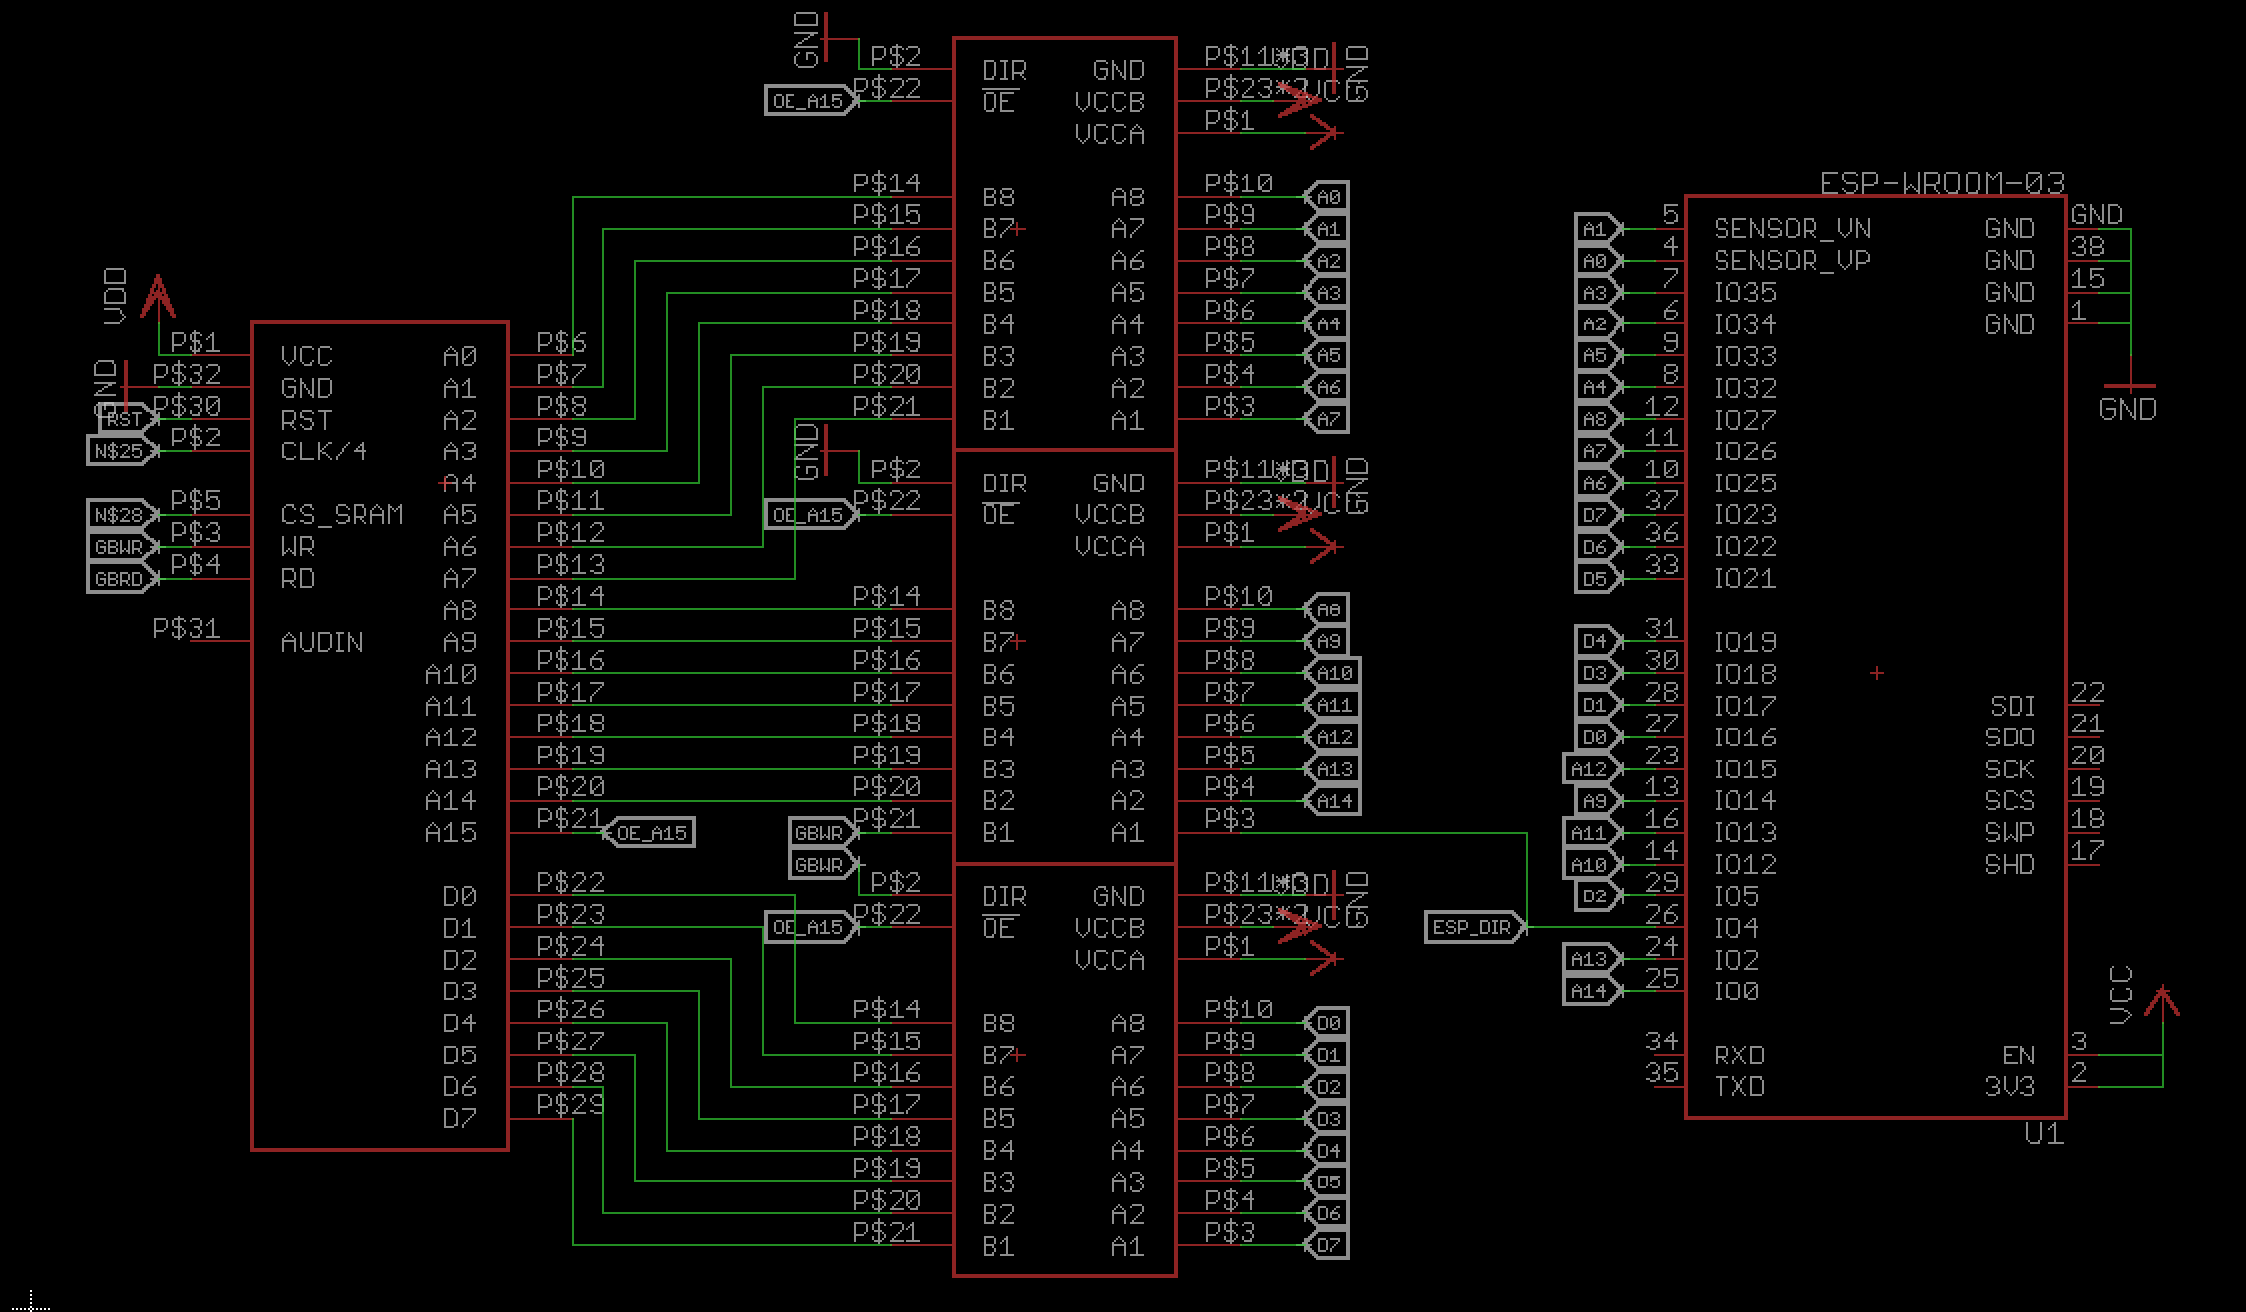
I was able to drop a 74LVC8T245 level converter and connect the address pins. A15 on the Game Boy is basically the "chip select" for the ROM / cartridge, when pulled down, since the address space of the 32kb is 0x0000 to 0x7FFF. SO I use that for the output enable pin on the lvl converter.
The Game Boy write pin will define the direction of the data pins lvl converter. The address lines will be pulled low, meaning the direction is always B->A. I use the pin that was previously the A15 pin to tell the ESP the direction of the communication.
A0-A3 are connected to input only pins of the ESP. Not unlike the ESP12F there are some pins that are connected to the SPI flash on the module and shall not be connected otherwise.
So far I only have the RX and TX pin free, but I consider to have the RST line on a transistor - maybe I need to hold the game boy in a reset state for a while, for the ESP32 to boot up and set all pins.
Not on the picture is the current power supply. I'm a bit worried about the two AAA / LR03 batteries in my Game Boy pocket, they're not that powerful in general and with the LED backlight it's not better. Drawing from the 5V switch mode to convert to up to 250mA will be a challenge. I might need to add a LiPo and/or some tantalum capacitors to make it work.
WIFI Game Boy Cartridge | stuff ordered
2017-04-19 09:44:24
so before I make a PCB and order it for a lot of money (that's almost true, I have a coupon), I thought I buy parts for a lot of money, but hey - there's more money to collect now [http://hackaday.com/2017/04/18/up-up-up-2k-more-seed-funding-for-projects-that-matter/].
Some almost breadboard friendly 74LVC8T245 were ordered, although they have their pinheaders upside down. [http://www.ebay.de/itm/302193394421]
I have an ESP32 basic adapter board (dual row headers, no power converting), but I'll wait on the breadboard adapter I've ordered, with all the bells and whistles. (full disclosure, I wrote balls the first time)
With that the 20bugs on that project are almost spend :) but it's good to have it. There are also two #Hornbill in the making, but they arrive much later.
WIFI Game Boy Cartridge | esp32 acting as cartridge
2017-04-18 16:46:53
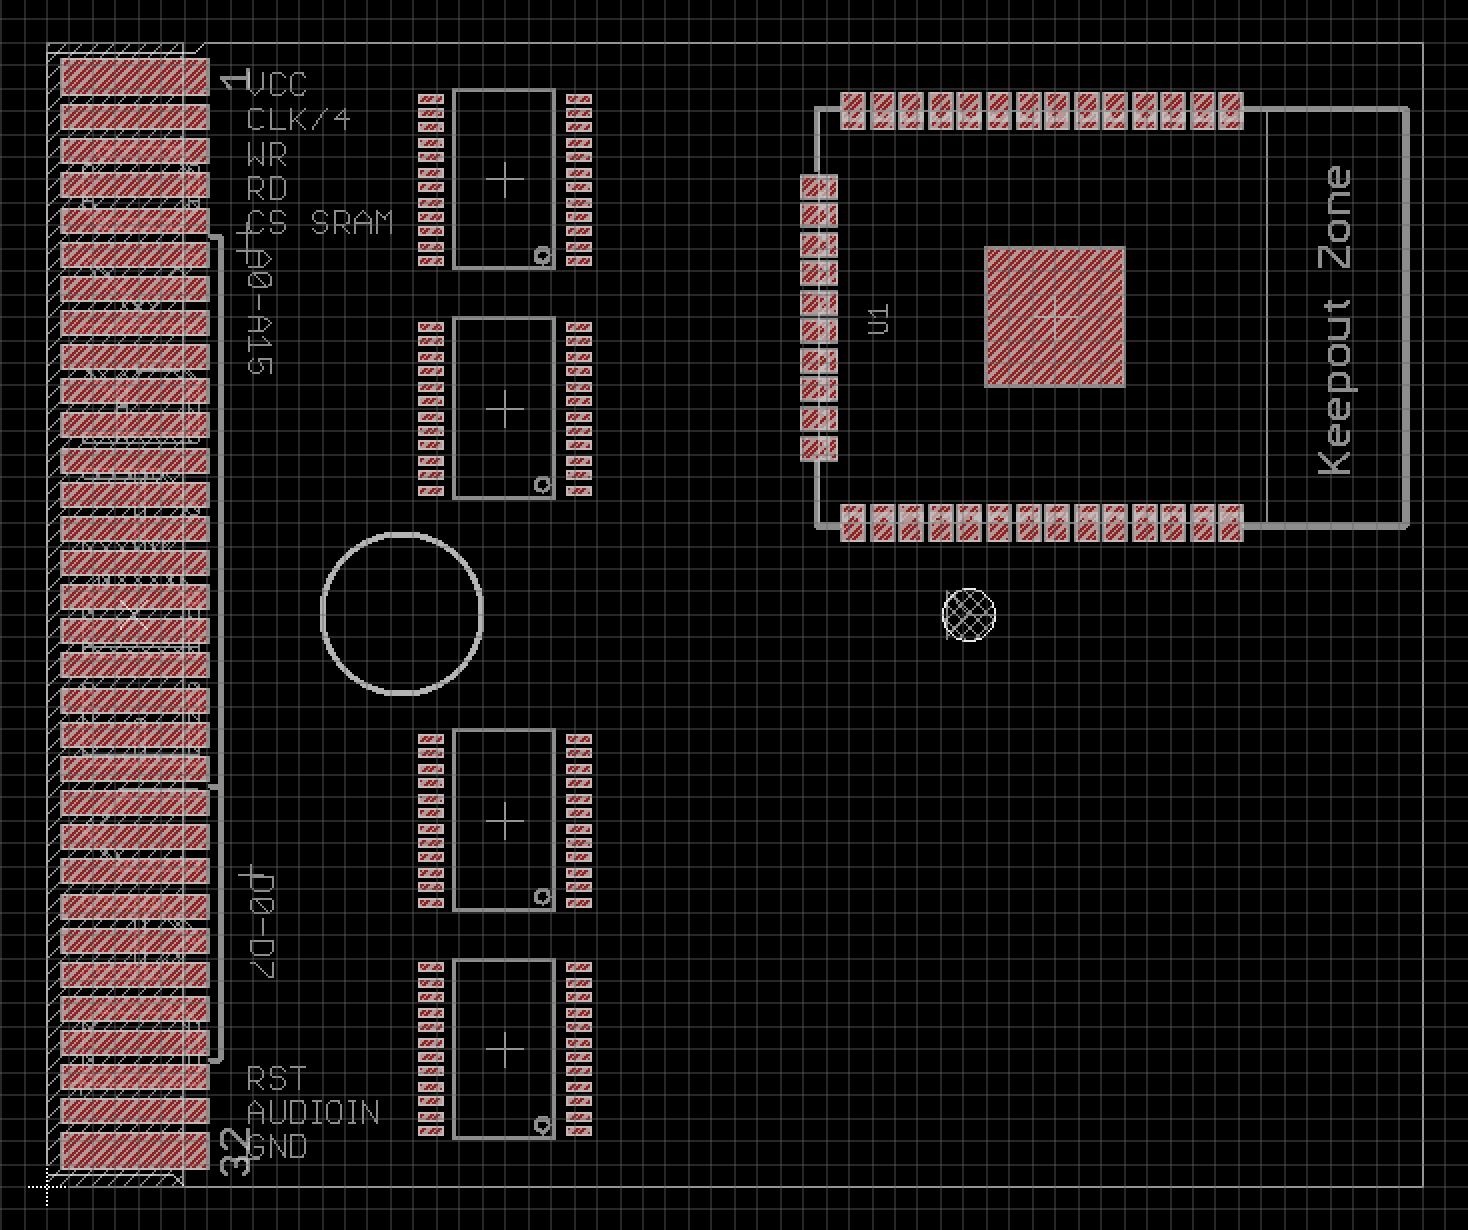
i would need 4 SN74LVC245
- 2 for the 16bit address port
- 1 for the controls
- 1 for data, where the direction could be controlled by the read/write pins
Game Boy Cartridge plus Programmer | Proud moment :)
2017-04-16 14:36:21
finally! So I took the cartridge code and just placed it as an array on the at90usb1287. Teh, after writing, then reading to the eeprom I got it to work :)

blinking things | HT16K33 board for 11x7 LED matrix
2017-04-15 18:04:49
I recently bought a cool 11x7 matrix, that is just great to display 4 3x5 digits and I want to control it with the well supported HT16K33 - so here's a not so beautiful and highly convoluted board for that.


WIFI Game Boy Cartridge | PINs and timings
2017-04-13 14:39:26
there are still some issues left to solve on my #Game Boy Cartridge plus Programmer project, that I want to solve this weekend [proud moment]. After that I will pin down the hardware. maybe an atmega32 would be an option as well for the "SRAM" part, but a faster atsamd21 seems more reasonable.
https://www.insidegadgets.com/2011/04/23/emulating-the-nintendo-logo-on-the-gameboy/
this tells me I should be safe with an ESP12 as an MBC1 controller. I need 8 pins for the cartridge and 3 for SPI to control the AVR. I don't need the data pins to be connected, I can use the AVR for that.
The next thing would be the SRAM. This will be handled by an ATSAMD21 / adafruit feather M0 (logger) board. It has 20 pins available, so I won't be able to fake an 8k SRAM. That would take 13 pins for address, 8 data and 3 control pins. Since I also need to connect SPI, I have 17 pins left. I need 11 pins for data and control, that makes 64 bytes fake SRAM.
Maybe I can use the ESP to make the AVR read the data pins and switch banks via SPI later.
Game Boy Cartridge plus Programmer | writing is off after some bytes
2017-04-08 23:58:14
So the Nintendo Logo is on the cartridge - I can see that because it scrolls down, but after the "bading" it stays black. A quick check comparing the original to the dump shows this:

Game Boy Cartridge plus Programmer | hackaday logo ROM
2017-04-06 00:03:23
http://www.chrisantonellis.com/gameboy/gbtdg/
with the help of this little website I was able to create a little Game Boy ROM, that displays the hackaday jolly wrencher. You can find the code and rom in the file sections. I tried to upload the files and write it to the cartridge, but had no success so far. Not sure what's going on, but I'm too tired to try to find out.
You only need to add the following code to the generated C file, depending on that your file was called something like HaDlogo.bmp - otherwise you have to rename stuff.
#include <gb/gb.h>
#include <stdio.h>

void main()
{
  set_bkg_data(0,255,HaDlogo_tile_data);
  VBK_REG = 1;
  set_bkg_tiles(0,0,20,18,HaDlogo_map_data);
  SHOW_BKG;
  DISPLAY_ON;
}
WIFI Game Boy Cartridge | looking for parts etc.
2017-04-02 23:02:03
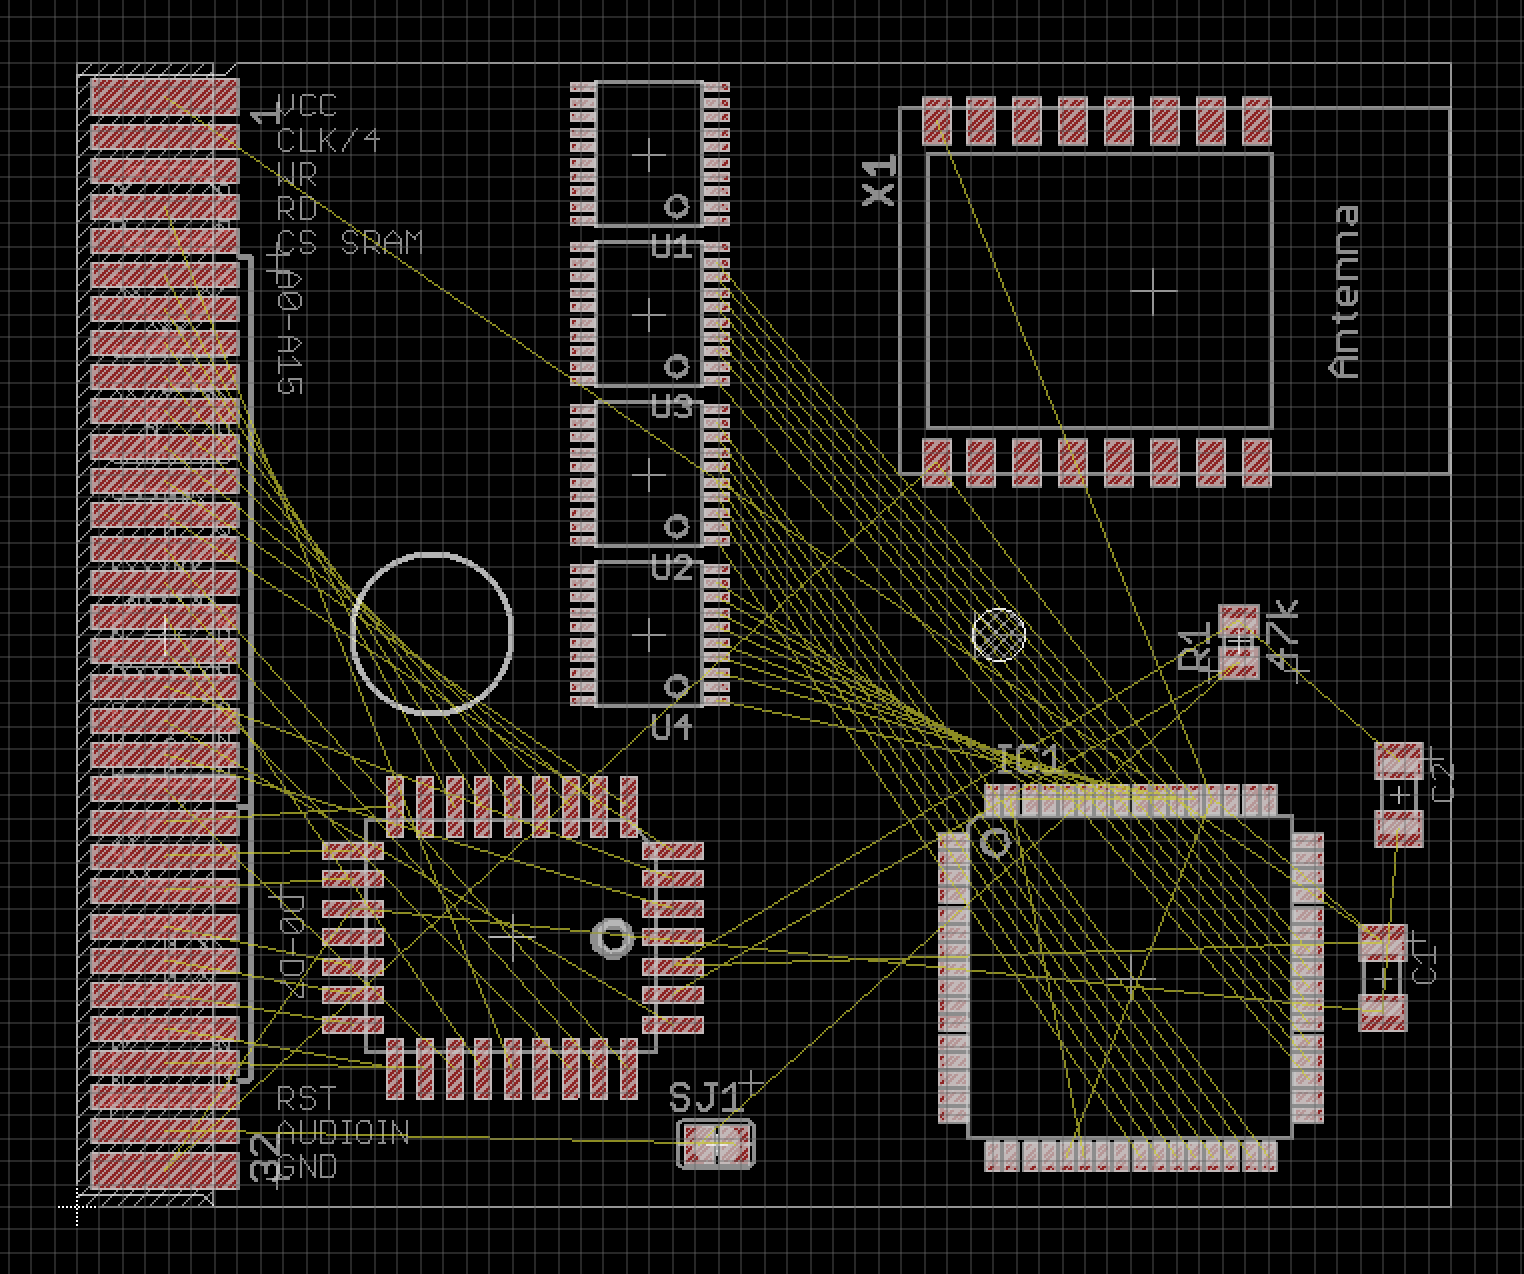
Starting from my #Game Boy Cartridge plus Programmer designs, I tried to add some parts and lay them out, to get a feeling for it. I still need power conversion and am thinking about adding a separate power source for the ESP side.
To Recap the Idea:
- the ESP12 will behave like a Memory Bank Controller (MBC) that handles the bus traffic, meaning who is asked for and who will talk (I still hope I have enough pins left)
- the AVR (AT90USB1287) will be connected via SPI to the ESP12 if it is to slow, I could just ask it twice or three times for the value to make sure I have the right data
- the ESP would know that the AVR has to be enabled, instead of the EEPROM, so it needs to be able to enable or disable them
- I need some level-shifting on the board from 3.3V to 5V and the ESP is quite power hungry, so maybe I'll add lots of caps or another battery
LCsoft Mini Board CY7C68013A in Sigrok on Mac
2017-03-07 12:00:24
Four Euros for a 16 channel, 24MHz logic analyzer is a pretty good investment. At least that's what I thought when I read this article on hackaday.com in 2012. It talks about the LCSOFT mini board being a clone of a Saleae 8 Channel logic analyzer, but with the help of the open source software sigrok it can be much more. Sigrok itself is a command line interface only program, but together with pulseview I think you will have the same experience as with the Saleae devices + software.
You just have to make it work first, especially when you're on a Mac. I've written a nightly rant the other day, but here I'm trying to compress the essentials to make it work.
First you need to have homebrew [https://brew.sh/] installed. If you do, you need to follow the "unstable" install route - doesn't sound comforting, more on: https://sigrok.org/wiki/Mac_OS_X
$ brew tap rene-dev/sigrok
$ brew install python3
$ brew install
$ brew install
$ brew install
$ brew install
$ brew install
Whenever pulseview(/sigrok) is opened, the firmware get's written onto the Cypress CY7C68013A (FX2LP) chip. For that you need to download the pre-built firmware files from here http://sigrok.org/download/binary/sigrok-firmware-fx2lafw/ and move them to the folder.
/usr/local/share/sigrok-firmware/
The other stuff I ranted about in here is just me trying to make fxload work, a tool you (probably) don't need for that.
burn firmware CY7C68013A on a Mac [nightly brain dump]
2017-03-06 02:50:43
Warning: Only read if you want to flash and use the CY7C68013A module with sigrok on a mac!
It all started six years ago with this article, written by @Mike Szczys: http://hackaday.com/2011/12/15/saleae-logic-analyzer-knockoff-hacking/
Once upon a time I bought a - CY7C68013A dev board [https://sigrok.org/wiki/Lcsoft_Mini_Board], because I read that one could use this shiny cheap thing with the fancy Saleae Software and it actually thinks it's one of their fancy equipment. I never really got it to work though (lack of experience, definitely). Skip forward 4 years and I thought to myself, this time I could make it work. Taking it with me on a vacation, I tried to make it work on a Raspberry PI, fooled around with the firmware, got frustrated, you guessed it, back in the drawer.
Now I'm fuzzing around with the Game Boy and thought that a logic analyzer would come in very handy, talked to guys in the #Hack Chat and gave it another try, this time with the open source program sigrok and their beautiful pulseview (you want that, not just the command line!) - side note: I'M ON A MAC.
If you want to have the beautiful GUI, you HAVE TO follow the build instructions called "UNSTABLE" - there is an instruction you can follow here: https://sigrok.org/wiki/Mac_OS_X - you need to have homebrew [https://brew.sh/] installed.
$ brew tap rene-dev/sigrok
$ brew install python3
$ brew install
$ brew install
$ brew install
$ brew install
$ brew install
Do this and you should be fine with a non-tinkered or vacation-flashed EEPROM. Otherwise you're in trouble again, my friend. When I fired up my CYWHATEVER module with the jumper set, I got the module recognized as a Saelae 8 Channel device, but when I tried the 16-channel version, it failed on me. Hmm, bad. So I had to flash the EEPROM somehow with something. K.
https://sigrok.org/wiki/Lcsoft_Mini_Board/Info#Flashing_fx2lafw_to_the_EEPROM
You need a little program called fxload. I found a guy that ported cypress fx2 stuff to work with mac and another guy that wrote a "tutorial", but before the first guy moved the folder in the git. So here's how I "managed" to make it work.
git clone https://github.com/nall/nexys2-osx.git
cd nexys2-osx/fxload
xcodebuild
ln -s build/Release/fxload-osx /usr/local/bin/fxload
I'm not sure if the linking part is correct, I had to unlink and use a direct link from where I downloaded it into. The thing is, xcodebuild will probably fail on you, if you haven't installed the 2GB+ xcode. If you have that, open the downloaded files / main.m and wait for a "we need to fix stuff" - yellow warning thing that you can push, this will fix the issue with a missing path to osx10.5 library thing. After that you should be finally able to use the xcodebuild command (I'm not an xcode guy).
So "luckily" the guys of sigrok offer a firmware file for everything and we're ready to go, right? Wrong. They're actually something else, you need a hex file for that, and as they say: "To flash the firmware, you will need a hex file containing the firmware, fx2lafw-cypress-fx2.ihx. Since the hex file is a byproduct of the build, you will need to build the firmware from sigrok-firmware-fx2lafw sources".
I tried to download the sigrok firmware part and compile it, so I can get the needed hexfile, that is not in the precompiled firmware folder. Bummer. But the './configure' script broke down on me, wanting a "sdcc-sdcclib", so I finally gave up and tried googling again, before firing up my rPI. Here is where I found my hexfile "fx2lafw-cypress-fx2.ihx":
http://lagrange.cloud-7.de/et_al/sigrok070_for_suse13.2/build/sigrok-firmware-fx2lafw/build/hw/cypress-fx2/
fxload -v -t fx2 -D 04b4:8613 -I fx2lafw-cypress-fx2.ihx
Now I'm just happy to tell, that Port B and Port D are reading and streaming! - Well. Seems like there's something else wrong and pulseview can't upload the firmware correctly to the chip, but it works if I upload it myself before starting pulseview. So bash script it is. Fancy bash script. Download the pulseview App starter here [https://cdn.hackaday.io/files/16188692587392/pulseviewAPP.zip] - and copy it into your applications folder. Can't find it in the finder searchbar yet.
[UPDATE] The firmware fix was actually easy, I just had to copy the precompiled *.fw files into
/usr/local/share/sigrok-firmware now runs without pre firmware fxload stuff. Yay! So not so useless after all.
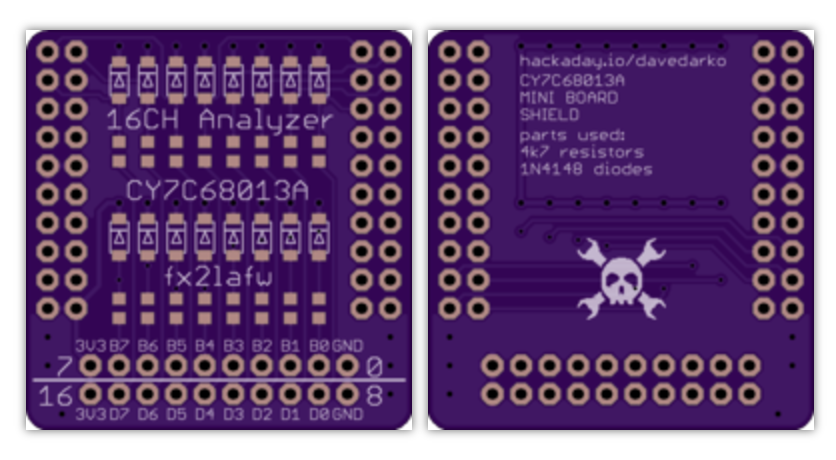
I've made a little board / shield, to go on top of the module, since the pinout is less optimal. It's based on the suggestions of the sigrok pages, some resistors and diodes for protection.

Porygon V2 - but not the evolution of Porygon | I took no pictures, so here is a horrible fritzing "schematic"
2017-03-05 15:09:16
The walking puppy Sketch for the Arduino is in the file section, as is this picture and the latest, unprinted revision of 3D files. There is still no glue and the perfect version would have to have a 2 part head section and screws on the body. Take a bigger battery though, something like >160mAh?